How to Choose Concept Art Software for Beginners
Choosing the right concept art software is crucial for beginners. Learn how to find the perfect match for your creative needs and budget.
Want to start creating digital art but unsure which software to pick? Here's a quick breakdown to help you choose the best concept art software for beginners:
Key Takeaways:
- Define Your Focus: Decide if you're into character design, environment art, or prop design. Each requires specific tools.
- Check Your Hardware: Ensure your computer meets the software’s requirements (RAM, graphics card, storage).
- Ease of Use: Pick software with a simple interface and lots of tutorials (e.g., YouTube guides).
- Features to Look For:
- Customizable brushes
- Layer management
- Perspective tools
- Color blending
- Budget-Friendly Options: Start with free tools like Krita or affordable one-time purchases like Clip Studio Paint Pro ($49.99).
- Test Before You Commit: Use free trials or demos to explore features and performance.
Quick Comparison Table:
| Software | Cost | Best For | Key Features |
|---|---|---|---|
| Krita | Free | Beginners, general use | Custom brushes, layers, animation tools |
| Autodesk Sketchbook | Free | Sketching, simple workflows | Clean interface, pressure sensitivity |
| Clip Studio Paint Pro | $49.99 | Comics, illustration | Vector tools, perspective rulers |
| Adobe Photoshop | $20.99/mo | Industry-standard workflows | Advanced editing, extensive tutorials |
| Corel Painter | $429 | Professional painting | Realistic media simulation, advanced tools |
Start simple: Free tools like Krita or Autodesk Sketchbook are great for beginners. Once you're comfortable, explore paid options based on your needs and budget. Your choice should align with your creative goals, hardware, and workflow preferences. Ready to start creating? Let’s dive in!
The Best Windows Drawing Apps for Beginners
Understanding Your Needs as a Beginner
Getting a clear sense of your creative goals and understanding your limitations can save you a lot of time, money, and frustration.
Defining Your Creative Focus
Different areas of concept art require different tools, so it’s essential to define your focus. The software that’s great for designing characters might not work as well for creating environments, and vice versa.
Start by figuring out what interests you the most:
- Character Design: This involves creating people, creatures, and their costumes. It requires tools that offer precise line control, detailed brushwork, and strong color management.
- Environment Art: Here, you’ll focus on landscapes, buildings, and atmospheric scenes. Look for software with perspective tools, a variety of texture brushes, and advanced lighting effects.
- Prop Design: This focuses on objects like weapons, vehicles, and everyday items. Clean geometric shapes and technical precision are key here.
It’s also important to think about the bigger picture. Concept art typically supports projects like animation, film, VFX, and video games. Knowing how your work fits into these pipelines can help you pick software that aligns with industry standards.
Consider your immediate goals as well. Are you sketching ideas for personal projects, building a portfolio for art school, or preparing for a career shift? If you’re working on a portfolio, make sure your software can handle the file formats and resolutions you’ll need to showcase your work online.
Finally, check your computer’s hardware to ensure the software you choose will run smoothly.
Checking Your Hardware and Operating System
Before diving into new software, it’s crucial to verify that your computer can handle it. This step can save you from the headache of purchasing software that doesn’t work with your system.
Here’s how to find your system information on the two major operating systems:
| Operating System | How to Access System Information |
|---|---|
| Windows | Press the Windows key + R, type "msinfo32", and click OK |
| macOS | Apple menu > System Settings > General > About > System Report |
Once you have your specs, compare them to the minimum and recommended requirements listed on the software’s official website. Pay attention to your graphics card, RAM, and storage capacity - these are especially important for handling large canvases and multiple layers.
Before you check compatibility, make sure your operating system and GPU drivers are up to date. Even if your hardware meets the requirements, outdated drivers can cause issues. For Mac users, performance monitoring Mac tools can provide helpful insights into your system’s specs and usage, making it easier to assess compatibility. If your computer won’t power on, you can usually find the make, model, and serial number on the case, which will help you look up its original specs online.
If your current setup doesn’t meet the requirements, don’t worry. Check if your computer can be upgraded. Adding more RAM or external storage can often make a big difference without the need for a full system overhaul.
Considering Ease of Use and Learning Curve
For beginners, ease of use is just as important as hardware compatibility.
Choose software with an intuitive interface and customizable workspaces. The ability to arrange tools and panels to suit your preferences can make your workflow much smoother.
Programs with large online communities and plenty of tutorials are also a great choice. Popular software often comes with an abundance of learning resources, including user-made guides and official tutorials. Platforms like YouTube are packed with helpful videos, making it easier to learn through trial and error.
Keep in mind that the learning curve varies widely between programs. Some tools are designed to be simple and quick to use, while others offer advanced features that take more time to master. For example, Photoshop can feel overwhelming because of its vast range of tools. However, its popularity means there’s no shortage of step-by-step tutorials to help you tackle specific tasks.
Creative Developer Mathias Paumgarten offers this advice:
"Personally I would tell you to use whatever tools you are most comfortable with. In my experience I've learned (for myself) that I get the best results using the tools I struggle with the least. Just because that reduces the amount of friction in the process."
Key Features to Look for in Concept Art Software
When selecting concept art software, it's essential to focus on features that align with your creative process. The right tools can streamline your workflow, while missing key functionalities might leave you stuck on basic tasks.
Essential Tools for Concept Art Creation
Great concept art software begins with the basics - tools that make your creative process smoother and more efficient. Digital drawing tools are now the go-to standard in the industry because they simplify revisions and offer flexibility when handling updates or client feedback.
Start with the brush engine, as this will likely be the feature you use most. Look for software that offers customizable brushes. As artist Amei Zhao from Australia explains:
"...brushes are highly customizable and easy to use".
Being able to tweak brush size, opacity, flow, and texture can make a big difference in how efficiently you work.
Layer management is another must-have. Strong layer support, including blending modes, masks, and grouping options, lets you experiment with colors, lighting, and composition without affecting the entire piece. This flexibility is crucial when working on complex projects.
For creating realistic environments or architectural elements, perspective tools are invaluable. Perspective rulers, grids, and vanishing point tools can help you maintain accuracy and consistency in your compositions.
Even if you're working mainly with raster graphics, vector tools can be a game-changer. They allow you to resize and reshape lines without losing quality, which is incredibly useful when clients request adjustments or when scaling artwork for different uses.
Selection and adjustment tools are equally important for refining your work. Features like magic wand selection, color range selection, and non-destructive adjustment layers can save you hours of manual editing during reviews.
Lastly, consider the color management system. A tool that handles color blending naturally can elevate your work. As concept artist Nacho Yagüe from Spain notes:
"...the way the brushes blend colors is fantastic".
Once you've got the basics covered, it's worth exploring how learning resources can help you get the most out of your software.
Learning Resources and Tutorials
For beginners, access to quality learning materials can make all the difference. Before diving into complex projects, take the time to explore the user guide provided with your software. A well-documented guide can help you not only understand the tools but also learn when and how to use them effectively.
Video tutorials are especially helpful for visual learners. Many popular programs come with a wealth of instructional content, from official training courses to community-created videos on YouTube. These resources often cover everything from basic navigation to advanced techniques.
Some software also includes built-in tutorials and templates, which can provide a structured way to learn. These step-by-step projects often teach fundamental concepts while helping you get familiar with the interface. They can also show how different tools and processes work together, offering insights that standalone tutorials might miss.
Don't underestimate the value of community support. Programs with active user communities often have forums, Discord servers, and social media groups where experienced artists share tips and answer questions. This kind of support can be a lifeline as you learn the ropes.
Finally, look for software that offers up-to-date support, including regular updates and responsive customer service. These features ensure that your software remains functional and relevant over time.
Performance and Stability
While tools and learning resources are critical, performance is equally important. Nothing disrupts creativity more than software crashes or sluggish responses. For beginners, software stability should be a top priority, especially when working on large canvases or multi-layered compositions.
Lag can be a major issue, particularly when precision is required. Test the software's responsiveness and stability with your typical workflow. Programs with efficient memory management and auto-recovery features can help protect your work and keep things running smoothly.
Tablet compatibility is another key factor. Your software should work seamlessly with your chosen tablet, supporting features like pressure sensitivity, tilt recognition, and button customization. Make sure to test these features with your specific hardware.
Cloud services for file sharing and backups aren't strictly necessary but can be a helpful addition, especially when collaborating with others.
Lastly, consider how frequently the software is updated. Regular updates often mean better performance, bug fixes, and new features. For instance, Corel's Painter 2023 update in June 2022 introduced a Fluid Brush system, enhancing the paint flow and mixing experience.
Customizing the workspace to suit your preferences can also improve efficiency. Software that lets you tailor the interface to your needs can reduce the time spent navigating menus, allowing you to focus on creating.
Budgeting and Licensing Options
When starting out in digital art, balancing your budget with your software needs is key. Luckily, you don’t have to spend a fortune to dive into the creative world. From free tools to professional-grade programs with flexible pricing, there’s something for everyone. Let’s break down your options, starting with free software and moving into subscription and one-time purchase models.
Free and Open-Source Software Options
If you're just getting started, free software can be a great way to learn the basics without any financial commitment. One standout option is Krita, an open-source program that offers advanced features like customizable brushes, layer management, and even animation tools - all for free. It's a fantastic choice for beginners who want professional tools without spending a dime.
Another excellent free option is MediBang Paint, especially if you’re into creating comics or manga. It includes tools specifically designed for panels and speech bubbles, along with cloud storage and a library of free materials to kickstart your projects.
For sketching and concept art, Autodesk Sketchbook shines with its clean interface and excellent pressure sensitivity support. And if you’re looking for something simple but effective, FireAlpaca offers a beginner-friendly experience with all the essentials for concept art.
While free tools are budget-friendly, they can sometimes lack advanced features, have occasional stability issues, or offer limited customer support. However, active user communities and online tutorials often fill these gaps, making them a great starting point.
Subscription vs. One-Time Purchase Models
Understanding pricing structures is crucial when planning for the long term. Subscription models, like Adobe Photoshop, charge $20.99 per month. This option spreads out costs and ensures you always have the latest updates, bug fixes, and customer support. That said, subscriptions can add up - $20.99 per month totals about $251.88 annually.
On the other hand, one-time purchases involve a higher upfront cost but can save you money over time. For instance, Clip Studio Paint Pro costs $49.99 for a perpetual license, while Affinity Photo is priced at $69.99. For those seeking advanced tools, Corel Painter is available for $429, though it may be too costly for beginners.
As software expert Kyle Murphy explains:
"For software that doesn't require constant updates or isn't core to ever-changing business processes, a one-time purchase can be more cost-effective over time".
If you plan to use software for years without needing frequent updates, a one-time purchase might be your best bet. For example, the $49.99 price of Clip Studio Paint is roughly equivalent to just 2.4 months of a Photoshop subscription.
For even more budget-friendly options, Paintstorm Studio offers a lifetime license for $19, and Rebelle 7 starts at $89.99 for its standard edition. These programs provide professional features without the ongoing costs of a subscription.
Price Comparison of Popular Tools
When comparing software, consider both upfront costs and long-term value. Here’s a quick look at how some popular tools stack up:
| Software | Pricing Model | Cost | Ideal For |
|---|---|---|---|
| Krita | Free | $0 | Beginners learning fundamentals |
| Paintstorm Studio | One-time | $19 | Budget-conscious artists |
| Clip Studio Paint Pro | One-time | $49.99 | Comic and illustration work |
| Affinity Photo | One-time | $69.99 | Photo editing & digital painting |
| Rebelle 7 Standard | One-time | $89.99 | Natural media simulation |
| Adobe Photoshop | Subscription | $20.99/month | Industry-standard tools |
| Corel Painter | One-time | $429 | Professional digital painting |
Over three years, Photoshop’s subscription costs about $754.92, while Clip Studio Paint remains a one-time $49.99 purchase. While Photoshop offers continuous updates and cloud services that professionals may find invaluable, your specific needs and usage will determine if it’s worth the price.
Many paid programs also offer free trials, typically lasting 7 to 30 days. These trials are a great way to explore features and see if the software aligns with your creative process before committing.
Starting with free tools like Krita is a smart way to build your skills without worrying about costs. As you grow and your needs evolve, you’ll have a clearer idea of when and where to invest in paid software.
Testing and Developing Skills with Your Chosen Software
Once you've picked your software, the next step is to dive in and start experimenting. This hands-on phase is where you'll figure out how the tools fit into your workflow while building the muscle memory that makes creating digital art second nature.
Using Free Trials and Demos
Take advantage of free trials or demo versions, typically lasting 7–30 days, to explore your chosen software. This is your chance to test essential features like brush responsiveness, layer management, and how well the program handles large canvases. Start with simple projects - like sketching a character or painting a landscape - to get a feel for the software's performance.
Before starting a trial, it helps to set clear goals. Decide what features you want to evaluate, such as ease of use or export options. This focus will save you from being overwhelmed by extra tools and features you might not need right away. Stick to the basics: sketching, adding color, and exporting your work. Avoid spending too much time on lengthy tutorials unless they’re directly tied to your goals.
Some programs also offer guided demos, which are great for learning the ropes when faced with unfamiliar or complex interfaces. These walkthroughs can give you a quick overview of the software's capabilities and help you navigate more confidently.
Practicing Key Concept Art Workflows
Getting comfortable with new software means practicing the workflows you'll use most often. Concept art thrives on iteration - it’s all about trying, revising, and refining based on feedback. Focus on essential tasks: sketching basic shapes, adding color, and exporting finished pieces. For character art, work on anatomy, poses, and expressions. For environment designs, experiment with composition and color adjustments while keeping key elements in focus.
Adopt a standard workflow to streamline your process: start with a concept, gather references, create thumbnails, refine your work into high-resolution drawings, and finish with detailed touches. Early on, prioritize efficiency by practicing quick thumbnail sketches to keep your creativity flowing. For character art, practice drawing human figures to understand anatomy and proportions. Pay attention to how the software handles details like pressure sensitivity and line variation. Bring characters to life by focusing on their personality - through poses, facial expressions, and clothing details.
When working on environments, avoid rigidly dividing the layout into sections, and keep important details away from the edges. Once you’re comfortable with these workflows, seeking feedback from peers or mentors can help you pinpoint whether any challenges stem from the software or areas where your skills need improvement.
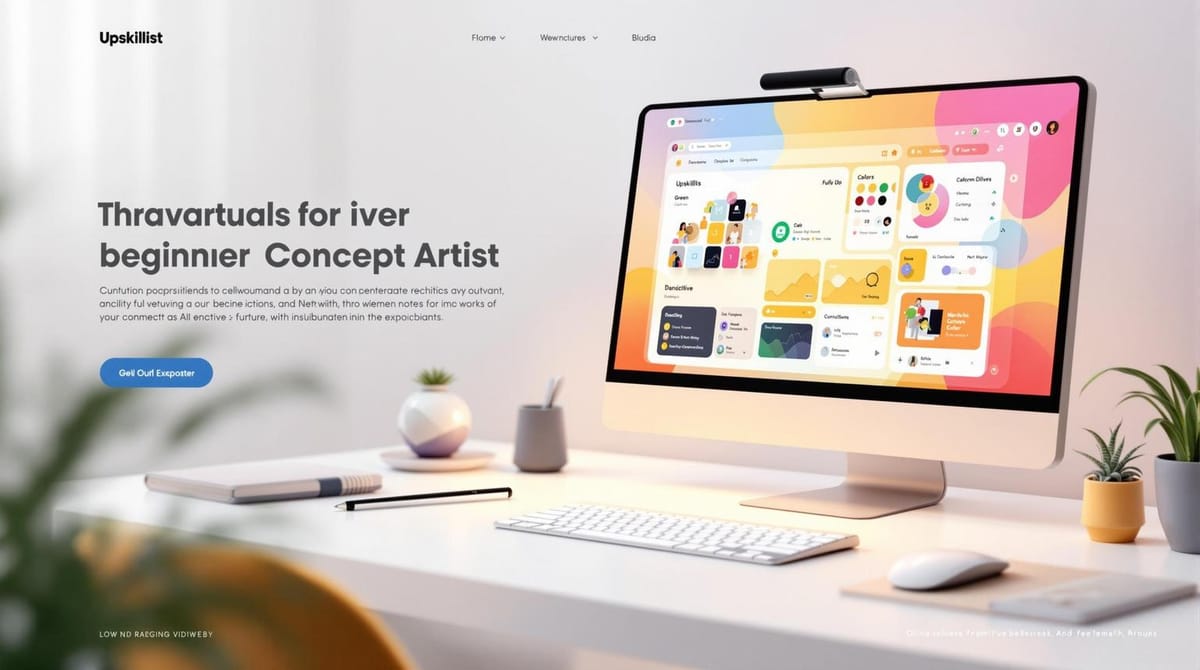
Using Educational Platforms Like Upskillist

Structured learning can complement your hands-on practice. Platforms like Upskillist offer courses that teach graphic design and digital art tools such as Adobe Illustrator, Photoshop, and InDesign. These courses combine text, video, and interactive materials, and with a 7-day free trial, it’s easy to explore their offerings and join a learning community.
Upskillist doesn’t just teach you how to use software - it equips you with practical skills that can elevate your art, whether it’s for a career or a hobby. For example, their graphic design courses cover everything from creating logos and editing photos to mastering typography and color theory.
The platform also fosters a sense of community. Through virtual classrooms, you can share your work, receive feedback, and even participate in live video discussions. Plus, the free trial gives you full access to premium courses and AI-driven tools, making it an excellent resource for building your skills. Combining this structured learning with your own experimentation can set a strong foundation for your concept art journey while helping you avoid habits that might limit your creativity down the line.
Conclusion: Making an Informed Decision
When choosing software, align your decision with both your creative goals and practical limitations. Key considerations should include ease of use, essential drawing tools, access to learning resources, hardware compatibility, and overall performance stability. It's worth noting that professional-quality work doesn't require the priciest software - plenty of successful artists have thrived using budget-friendly or even free tools.
Once you’ve identified your technical and creative needs, focus on software that complements your workflow. Prioritize tools that address your immediate requirements rather than getting distracted by advanced features you may not use for a long time. Look for programs that provide customizable digital pens, essential sketching and painting tools, workspace flexibility, support for standard file formats, and dependable performance.
Budget constraints shouldn't hold you back. Free options like Krita deliver professional-level functionality, while affordable choices like Clip Studio Paint PRO, available for $58.50 with a perpetual license, offer excellent value for beginners. The trick is to separate your "must-haves" from your "nice-to-haves" to make the most of your budget.
Take advantage of free trials, which typically last 7–30 days, to explore potential software options. These trial periods let you experiment with essential features and decide if the software truly fits your needs.
Once you've narrowed down your choices, test each one with a real project. You might also find it helpful to involve other artists for their perspectives. Ultimately, the best software is the one that feels intuitive and supports your creative vision. Whether you opt for a free program or invest in a premium tool, the most important step is to start creating and honing your skills. By rigorously evaluating your options, you’ll find a tool that becomes a seamless extension of your creative process.
FAQs
What features should beginners look for in concept art software?
When you're just starting out with concept art, it's important to pick software that's simple to navigate, adaptable to your needs, and easy on your wallet. Go for tools with an intuitive layout that let you dive in without feeling lost. Key features like layers and customizable brushes are must-haves for crafting detailed and versatile artwork.
Make sure the software works well with drawing tablets, as they can enhance your accuracy and control. Cost matters too - look for budget-friendly options or programs that offer free trials, so you can explore without committing financially. Lastly, choose software that provides tutorials or an active user community to guide you as you develop your skills.
How do I check if my computer can run the concept art software I want to use?
To determine if your computer can handle the concept art software, start by checking its system requirements on the official website. Pay close attention to the specs for the CPU, RAM, GPU, and operating system, and compare them to your computer’s hardware.
If you’re not sure how to find your system’s specs, you can look them up in your system settings. On Windows, tools like Task Manager can help, while macOS users can check under "About This Mac." For extra confidence, you might want to browse user forums or read reviews to see how others with similar setups are running the software. This can give you a clearer idea of what to expect in terms of performance and compatibility.
What are some good free or affordable concept art software options for beginners?
If you're venturing into concept art and need free or budget-friendly software, there are some excellent tools worth checking out:
- Krita: This free, open-source painting program is great for digital art and illustrations, offering a wide range of brushes and tools to bring your ideas to life.
- GIMP: An open-source image editor packed with features, making it a solid choice for creating and editing digital art.
- Inkscape: A free vector graphics editor, perfect for scalable designs like logos, icons, and detailed illustrations.
These programs are not only easy on your wallet but also packed with features to help you build your skills. Give them a try and see which one complements your creative style and workflow best!